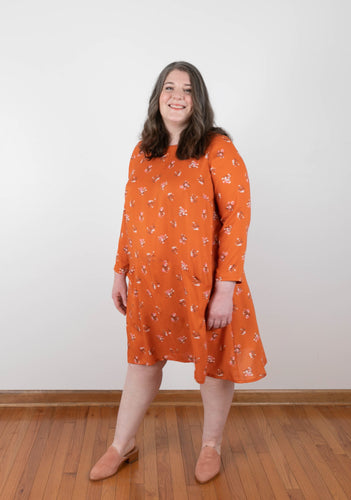
Lining the Sleeveless Farrow Dress : Part 3

Today we are continuing the series of tutorials showing how add a lining to the Farrow Dress. So far, we've covered how to draft patterns for the lining and facings and how to line the long sleeved farrow. Here we will show you how to add a lining to the sleeveless Farrow or View A.
For this tutorial you will need:
- Farrow Dress Pattern
- Your desired main fabric - yardages listed in pattern
- Your desired lining fabric - same yardage as main fabric
- Fusible interfacing - 1 yard/1 meter needed for all sizes
- Paper, rulers, pencil, and tools needed for drafting the lining and facing patterns.
- Hook & eye
- Thread
Before we begin:
- Cut out all pattern pieces (excluding facing pieces-we will be making new ones) needed for the sleeveless Farrow Dress (View A) from the original pattern.
- Draft the patterns for your lining and facings following the tutorial here.
- Following the cutting layouts included in the pattern booklet, cut the Farrow pieces out of your desired main fabric for the shell of the dress.
Now that you have your main dress ("shell") pieces cut out and the new lining and facing patterns drafted, we can get started!

With your newly drafted neck and armhole facing patterns- cut the facings out from your main fabric as well as the fusible interfacing.
Apply the interfacing to the wrong side of each facing piece according to the pressing instructions included with your interfacing.
Your facings are ready and can be set aside for now.

Using the newly drafted lining patterns- cut the dress linings out from your desired lining fabric. There is a cutting layout provided in the drafting tutorial here.
All the dress pieces are prepped and ready to be assembled!

We will first construct the shell of the dress. Due to the unique way in which we attach the lining to the shell- we need to keep the shoulder seams and center back open. Keeping this fact in mind, sew the Farrow Dress together from steps 2-8 following the instructions in the pattern booklet. Please note: to keep the back seam and shoulder seams open you will not be sewing the center backs together in step 3 or sewing the shoulders together in step 8.
Your shell is now ready to be lined and can be set aside for now.

**Please note: all seam allowances are 1/2" unless otherwise stated**
With right sides together, pin the front neck facing to the neckline of the front lining. As you can see, we are fitting a convex into a concave curve so some manipulating and easing will be required. I find it helpful to mark the centers of the facing and the lining to use a match point.
Sew the two together along the curve and, though it is not pictured here, serge or finish the seam allowance if desired. It is optional to finish this seam allowance as it will be hidden within the layers, though I find serging this raw edge to be a non-bulky way to prevent fraying and promote longevity of the garment.
Hot tip: I find it helpful to sew with the lining facing up so I can make sure everything is flat and smooth without any puckers or gathers.
Additionally, If your lining has a tighter weave you may want to notch or clip your lining seam allowance to release fabric tension. Im using a rayon for my lining which has more give and no need for clipping here.

Press the facing up and away from the lining and the seam allowance down towards the lining. Topstitch on the lining about ⅛”- ⅜” away from the seam line through all layers to anchor the seam allowance in place. Repeat for the back necklines.

With right sides together, pin the back armhole facing to the back lining armhole, again easing and manipulating the lining fabric to facilitate the curve. Sew together and finish seam allowance if desired. Press facing away from lining and seam allowance down towards the lining. Topstitch on the lining ⅛”- ⅜” away from the seam line through all layers to anchor the seam allowance in place. Repeat for the front armholes.

This is what the pieces will look like when all the facings are attached.

With right sides together, sew the side seams of the front and back lining together matching notches and making sure the facings are aligned. Finish the seam allowances and press towards the front.

With the right sides together lay the lining over top the shell and align all armholes, necklines, notches, and seam lines and pin in place. Stitch together at each armhole and neckline leaving the shoulder seams and center backs open for now.
Hot tip: Using pinking shears, trim the seam allowances of the necklines and armholes in half. This will allow the curves of the armholes and neckline to lay flat. If you don't have pinking shears, you can also just notch the seam allowance of the curves.
Press the seam allowance towards the facings.

Separate the shell from the lining and edgestitch along the facing of the armholes and necklines ⅛” away from the seam line through the facing and seam allowances. It takes a little extra patience to manipulate the fabric to stitch all the way up into the shoulder but just take it slow and make sure no unwanted fabric is sneaking underneath.

Turn everything right side out and give the necklines and armholes a good press.

Now for the magical part of the tutorial! Sewing the shoulder seams. Keep the front shoulders right side out and turn the back shoulders inside out. Tuck the front shoulder into the back shoulder, making sure nothing is twisted, and the right sides of the shell are together and the right sides of lining are together. Align the seams and make sure the raw edges of the shoulders are flush.

Sew across the shoulder seams. No need to finish this seam allowance as it will all be hidden inside.

Turn everything right side out and give the shoulders a good press.

Separate the lining from the shell. With right sides together, align the center back edges of the shell together and the center back edges of the lining together, matching notches and seam lines. Sew each center back seam starting from the hem and ending at the notch closest to the neckline.
At this stage, you can simply hand sew the back neck opening closed or keep following along for a handy way to close the opening by machine.

With right sides together, align one side of the center back neck opening- shell to lining. Make sure to move the other side of the opening out of the way so it does not get caught when sewing.
Sew this side of the opening closed by starting at the neckline and ending exactly where you previously stopped sewing at the notch. Be sure not to sew past this point or the opening will have puckers and not lay flat when finished. Clip the corner. Repeat for the other side of the center back opening.

Flip the back opening inside out and press the seam allowances open. Here I've used a tailors point press to help achieve crisp corners and a flat seam.
Press the center back seam allowances of both the shell and the linings open.

Turn the dress right side out and give the back opening a good press.

On the inside of the garment, sew a hook and eye at the top of the neckline.
The Farrow Dress is almost complete it just needs the hem! Hem the shell of the dress as it states in the pattern instruction booklet. Follow the tutorial here to hem your lining.
That's it! Your Farrow Dress is now complete! Give it a good press and wear it out!
We hope you found this tutorial helpful as you can apply this technique to any sleeveless garment you would like to add facings and linings to!